Quantcast
Channel: Crafters In Disguise
Viewing all 121 articles
Browse latest View live

Anime Review: GA Geijutsuka Art Design Class

$
0
0


GA is a started off as a 4 panel comic strip about students in an Art school.  They've translated it into an anime of just mini stories of their simple adventures of learning about art.  The style is much like Lucky Star in which you can jump in and out at any moment and it gives you a little smile on the cuteness.


Besides the cuteness, what I like about the show is that you can actually learn a lot about art.  They throw in tons of little art tidbits as you watch the students learn and practice art in their courses.  They learn -> Audience learns.


On the first episode alone I learned about
- Pictogram vs an Monogram
- Paints that Blend rather than Layer
- How to make Eraser Puddy


Update a mask to a new species

$
0
0
Ever have a hard time finding just what you want, but something very similar?

I had a friend who wanted a Zebra mask but had a hard time finding one that looked nice.  But he did find a donkey mask he like.

He asked me to paint it to become a Zebra for him


The mask scared me a bit, but I was able to do the job with some acrylic paints.

Ruffled Diaper Cover

$
0
0

Sometimes I find a pattern on sale that I can't resist. I mean, look at this adorable ruffled diaper cover! Little Lolo needs this.

I used some fabric and lace remnants I inherited from my grandmother's stash and put this together while Lolo was napping. In all I think this took about foir hours at a very leisurely pace. I added my own trim and front pockets but otherwise stuck to the pattern (view A).

For a tip on gathering fabric to make ruffles, check out my quick video on Instagram here: http://instagram.com/p/pFbkTlBb48/

Worbla Tips: Tooth Picks

$
0
0
Simple Tip:  Toothpicks can be used to add dimensional design without using up extra Worbla.  Besides have you ever tried creating a straight line with a ball of warm Worbla?


Worbla Tip: Tape

$
0
0
Simple Tip:  
Ever have your Foam or Worbla pieces fly away because of the wind from your heat gun?  Secure your Foam to your working surface with some office tape.  Or use it to keep those toothpicks steady, nobody will ever know it's been sandwhich inside.


What's this about Toothpicks? worbla-tips-tooth-picks


Wonder Woman Sword Part I

$
0
0

I've been rather stuck on this piece for a while.  Though I'm having fun learning to work with Worbla, my blade was such an issue.  I didn't want to make it out of Worbla cause that honestly would cost a lot of money for a flat sheet of plastic, so I resorted to insulation foam (found in many of our other large props).  I tried twice, resulting in blades that were too thick, too wide, just something I hated ...

Until yesterday when I came home to find that boyfriend had a package and left the box in our recycling stash.  Cardboard to save the day.  It's thin, flat, and sturdy when layered.  I can even create that angular middle and allow the blade edges to be thin (and now flake off when hitting someone with a foam piece).

So one AneComi Wonder Woman sword made from

1. Worbla and Craft Foam for the details
2. PVC for the Handle 
and added dimention and strengh within the blade
3. Cardboard for the blade

Wonder Woman Sword Part II

$
0
0

I'm retrying some of Kamui Cosplay's painting techniques.  One in which you paint the base colour of your prop what you want the burnished colours to be.  I hadn't liked this technique in the last because it waste a lot of paint, and I can find I can achieve the same outcome with the opposite technique of applying the burnished colour afterwards.  I will admit, but made it much easier to ensure that the burnished colour are within the tiny crevices of all of the seams.  

I think I need to continue practicing between both painting orders to see which one I really prefer.  

This is the first time I'm doing the burnished gradient really not evenly.  Oddly I really like it, although I hated it while making it .... WHY ISN"T IS STRAIGHT ... takes a step back to look at it, Wow it's really cool :) ~Happy accident~

Wonder Woman Sword Part III

$
0
0

I found that a careless sponging paint job actually looked more rugged than a carefully gradient paint job.  I tried really carefully to create a gradient from the silver to the black (base) paint for the silver.  It took a lot of time and stress.  Than for the gold on black (base) paint, I was fed up and randomly jabbed my sponge in the correct areas ....  Funny how I love the gold part better.  It looks a lot like the scratchy sketch lines from a *some* comic artist styles. (A style I love)


White Hair Bun Accessories

$
0
0
Just some silly pictures.

Chun Li satin bun covers with tassles
vs 
Sailor Serenity wig odangos 


oh how can cosplay of such different series result in such similar silliness

Captain America FLEECE shield

$
0
0
Simple cut out shapes with soft fabrics can make great plush cosplay props


Baking Roses from Bacon

$
0
0

  1. Cut Bacon strips into thin strips (usually a standard Bacon strip in half).  
  2. And roll it up.  
  3. Cut out some leaf shapes
  4. Bake
You can build a whole bouquet out of this technique for your Bacon loving hunny.


Maternity Cosplay - Making a Padme Costume in One Week

$
0
0
I made Padme Amidala's Mustafar "sleeveless" costume for Emerald City Comicon 2015 in 23 hours over 4 days. I wanted to share tips on how I made it because it is a very comfortable maternity outfit, a great cosplay option for pregnant mamas!

ECCC 2015 - Mustafar Padme Amidala by Avalyn Cosplay

- I had only four days in which to make the costume (M-Th)
- I had little to no experience making pants, and no patterns! I couldn't find the right leggings at the mall on short notice, so I was going to have to figure out how to make them.
- I made the entire outfit for a Total Cost of $25.25.

It was a last-minute decision to tackle this project but I am so glad that I did! SmallRiniLady and I were presenting a cosplay panel on Friday and I felt it was necessary to wear a costume but I couldn't wear my old costumes since I was 5 months pregnant. Padme in Star Wars III:Revenge of the Sith was my natural choice for a recognizable pregnant character; my first cosplay was Arena Battle Padme from Star Wars II:Attack of the Clones, so this was like coming full circle.

At the EMP/SFM Star Wars Costume exhibit

1. Collect Reference Photos

Get as many photos as you can up front before you start a new costume recreation project! There is nothing worse then getting near the end of your build before finding a picture shot from the back that shows your character has a prehensile tail you didn't know about...

I started by doing an image search on Google and Bing, using my smartphone. Then I found amazing close-up detailed reference photos on padawansguide.com .

I saved all of these images to my smartphone, then uploaded five essential images to the Cosplanner app so I could easily find them again.

This is a picture of the ACTUAL MOVIE DRESS being made!
- at the Star Wars Costume exhibit at the EMP/SFM

2. Figure Out What You Need and Buy Stuff

Materials needed for making this costume:

  1. Fabric for leggings: Cream stretch knit fabric (should stretch width-wise across your leg for a snug fit, does not need to stretch length-wise)
  2. Fabric for the dress and gloves: Oatmeal/tan suedecloth 
  3. Material for the harness: Dark brown leather or faux leather (I bought 8" of 60"-wide $35/yd synthetic leather from the home decor department) - you actually only need about 4" or so at 60" wide. 
  4. Interfacing for the collar.
  5. Fimo (moldable plastic clay like Sculpey that you harden by heating in the oven) for the filigree details on the broach and harness "buckle". 
  6. Fabric Paint for the sleeve emblem (I used brown acrylics over black fabric paint because I couldn't find any brown fabric paint)
  7. Acrylic Paint - shades of gold for the filigree pieces, browns for the sleeve emblem

On the Sunday before the convention I found all of my fabrics at JoAnn's. After a moment's hesitation at the cutting counter (can I REALLY get this done before Friday?), I took the plunge! 

Total Cost: $25.25

- Disclaimer: this is the total amount that I spent this week on this costume. I did not count in the price of the boots I already had ($35), the Fimo that I already had (I think I bought it for $2 on clearance 6 years ago), or all of the tools I used which I already had (sewing machine, serger, thread, needles, elastic, fusible interfacing, tailor's chalk, markers, pointy stick tool for detailing the Fimo, paintbrushes, acrylic paints I already had, hot glue and glue gun, oven, the craft room and tables in my house, etc.).

Stuff I left out:

I took short-cuts on the boots and hair, using boots I already had, and just braiding my natural hair instead of making a hair piece. If you are trying to make this costume to wear at Rebel Legion events, please see Rebel Legion Costume Standards for Padme Amidala/Skywalker (Tan Mustafar Outfit)

3. Sew the Costume Garments


Monday I started sewing the dress. Breaking down the construction I planned to make the top first, with seams to shape the bust. I found a jacket pattern (Simplicity 2207) in my collection that would do. I used the front and back pieces, chopped them off at the waistline (the dress has an empire waist) and excluded the sleeves. I left some extra fabric at the tops of the armholes to account for the shape of the fabric coming over the shoulders. Then I sewed the top pieces together according to the instructions in the pattern. In the interest of saving time, I did not put lining in the dress.

My method is to try it on (inside-out), pin it strategically, take it off and adjust the pins slightly, smoothing the fabric, then try it on again to verify that works, then sew it. I use both a serger and a sewing machine.

Here all I have done so far was sew together the Simplicity 2207 jacket pieces.

Next, I sewed up the front, leaving enough of a V-neck to fit my head through (this would be pinned together with the broach later). Then I finished the armholes with a rolled hem.

After that it was a matter of draping on a skirt, drafting a collar and hemming everything. The collar was the most complicated part; I started with the bottom edge of the pattern that came with the Simplicity 2207 jacket pattern, traced it onto pattern tracing material and made it into the larger rounded shape I wanted.

The skirt part is pretty straight-forward if you have had a little bit of experience making dresses or skirts. I made the skirt with two pieces (front and back), attached it to the jacket at the high "empire" waist, fitted the front draping over my baby bump, pinned down the side edges perpendicular to the ground, sewed it on, and turned under the bottom edge to hem it.

For the harness straps I cut two 2" strips from the faux leather (which I assume was 60" wide). I turned down both long edges 1/2" and sewed them 1/4" from the edge. I pinned the straps to the dress at the back but did not sew them until after I made the hardware. (This is a fast, cheap, but nicely finished look. For a more accurate look I would have used real leather or at least had no stitching lines showing. Also, in hindsight I think my straps could have been up to 1/4" wider in the finished and still would have worked.) 

For the finger-less opera gloves, I created my own pattern, designing one sleeve as two pieces sewn together, the seams running  from hand to bicep. 

Squeezing a glove pattern piece onto fabric remnants!

I measured the length of my arm from where I wanted it to start and end, plus extra length for a rolled helm at the hand and elastic casing around the upper arm. Then I started measuring the circumference of my arm at various points, making sure my thinnest point at the wrist would still be big enough to fit my hand through. I cut my four fabric pieces out of the scraps from my dress (I barely had enough because I forgot to account for the gloves, whoops!).

For the leggings I styled them after my favorite super-comfy maternity leggings from Loved by Heidi Klum. But Padme's leggings have vertical seams up the center front and back of the legs, not at the side seams, so I couldn't just trace existing pants and I had no patterns that would work. I needed to figure out how to make these by myself.

Finished maternity leggings and finger-less opera gloves


So to make the pants I cut my fabric in half (one piece for each leg) and cut the U shape for the crotch area center seam first. I just grabbed a random pants pattern in my size and traced the U shape for the center seam, putting together the front and back pieces. I left enough room to wrap around the front of my leg but kept the back bigger so it could wrap around the back and meet the other edge at the center front. I stitched the U's together then pinned the fabric to my clothes to drape the legs. It was a matter of pinning at the widest point, letting the fabric hang straight, then pulling it tight to follow the curves of my body and pin as I go. 

I made a waistband of a straight strip of fabric in a tube around elastic, then pinned it to the top of the pants keeping it high in back and low under the belly in front, overlapping the front edges in a V with the ends disappearing. I gathered the top edge of the pants to fit it to the waistband.

4. Detail the Costume

For the brown Sleeve Emblem I saved time by painting it on instead of embroidering. Note that the emblem only appears on Padme's left arm (yay, I only have to do this once!).

Now, if only I had remembered to buy fabric paint! I made a quick trip to Wal-Mart in the middle of the week and discovered there was no brown fabric paint! So I bought black puffy paint instead (no time for a trip to another store!) and decided I would use some brown acrylics I already had at home to brush on top of the black.

I drew the emblem onto paper by hand (it took three attempts to get the size and shape right), then cut it out to use it as a stencil. I put paper between the two layers of fabric to prevent bleed-through of the paint, positioned the stencil, roughly brushed on the black, removed the stencil and finished off the edges and small details by hand.

First I brushed black fabric paint onto the left sleeve and let it dry overnight.

After the fabric paint dried overnight, I dry-brushed dark brown acrylic over the black fabric paint. Then I used a lighter brown to brush on highlights, assuming a light source would come from above. This gave the effect of embroidery and was very quick and easy to do!

Here is the final emblem, with the brown acrylics over black puffy paint, brushed onto suedecloth.
Lastly, I made the broach and buckle filigree pieces. I haven't worked with Fimo very much, so I started with the smaller broach, hoping it would be a success. Worbla would not have been a good choice of material; it isn't very smooth and I wouldn't be able to get such tiny, fine details with it. I needed something flexible yet sturdy so it wouldn't just break apart halfway through a convention day. Metalwork is not in my repertoire, so Fimo seemed to be a good choice (it was!).

The first step was to bring up close-up reference images and sketch the designs onto some paper, at scale. Then I could start forming the Fimo by hand right on top of my sketch, working from the bottom up. I tried to give it extra thickness and weight where I could, to make the delicate pattern more sturdy.

Making the broach.

After the Fimo hardened in the oven, I primed and painted it (I may have forgotten the primer!) using black acrylic as a base; then I layer Copper over the black, and Royal Gold on top, with another shade of gold dry-brushed on in areas. The mixture of metallic colors gave it an aged, dimensional look.

I hot-glued the buckle onto a pin-back and pinned it to the dress to close up the V-neck below the collar.

The finished broach

I repeated the whole process with the buckle for the harness. I actually sewed the two straps together in an X, then I traced the straps onto my paper first so I would be able to make the "buckle" fit the straps correctly.

I only drew one side of the buckle since it is symmetrical.
After I finished making the buckle (I think this took 1-2 hours), I carefully peeled it off my paper and transferred it to tin foil on a cookie sheet. Then into the oven it went!

Fimo buckle, ready for the oven.
 I painted the buckle the same way I painted the broach. I did not add Mod Podge or anything on top of the metallic paint; usually that will change the paint surface to make it look less metallic. I would rather just re-paint it later if anything rubs off after wear. Since I dry-brushed it, it should not flake off, it will just rub off a little on the edges over time. (After three days of wear, the only place it rubbed off was on the top center tip and it was only noticeable on close inspection.)

The finished "buckle" for the harness.

Lastly, I attached the buckle piece to the harness using hot glue in three places. The hot glue held up pretty well. It did start to peel off in two places on the first day; I hot glued it again at the Cospitality Lounge and it stayed put through two and a half more days. I would rather have it peel off the harness than break apart in the middle of the filigree; that it one big reason why I used hot glue to attach it.


I am super happy with how my costume turned out! I wore it to ECCC 2015 on Friday and Saturday, and then I wore it again to the Star Wars Costumes exhibit at the EMP/SFM in Seattle on Tuesday.

Mother/Daughter cosplay! Avalyn Cosplay as Padme with #LittleLolo as Princess Leia at the EMP/SFM in Seattle


Gift wrapping with a TShirt

$
0
0
Don't know what to do with those free tshirts you get a career fairs or other promotional events?

How about using them to wrap your next Christmas/Birthday present.  Recycle, Reuse, and Reduce.  YAY


Costume Stress Testing, Toddler Style

$
0
0
When you're making a costume for a toddler, you want to make sure it will hold up to toddler antics. I put this Boo costume (from Disney's Monsters, Inc.) on my daughter to see if she would like wearing it. It's a bit like wearing a sleeping bag, with flippers. Needless to say, she liked it so much she started dancing around!


After I posted this video on Facebook it quickly went viral and amassed over 1.2 million views! Wow! I can't even read all of the comments, but apparently a lot of people know someone who has a little girl who would also make a really cute Boo. :)

Once I finish the costume I'll do a blog post on it. All I have left is finishing the hood and getting the eye stalks attached. I may also need to make the shoe "flippers" all over again because her feet grew.

Fun fact: I started making this monster costume months ago, but my daughter was scared to get into the "tunnel"; the costume did not look like clothes to her! Now that she's two-and-a-half, she is much braver. Once she is three I will see if she might be interested in wearing foam armor.

Edna Mode Cosplay

$
0
0
LittleLoloCosplay as "Edna Mode" from Disney's The Incredibles.

"Edna Mode" is a quirky fashion designer who creates costumes for super heroes, most notably known for saying "No capes!" and "I don't look back, darling..."

I made this costume dress in under 5 hours (over a span of 3 days), using mostly decade-old remnants from past projects. In total, I spent less than $40 to make this.


Dress: Made from upholstery vinyl and fashion pleather, a roll of insulating foam, sport zipper, black corset boning, with stretch gauze lining and pink shirting trim. Everything was remnants (free) except for $2 worth of pink fabric.

Glasses: under $10, purchased via Amazon Prime.

Boots: $30 purchased at Nordstrom (I "splurged" here since the rest of the costume was basically free)

A snapshot of my pattern pieces.
I drew my pattern from scratch. For the dress, I just traced one her shirts and used the same pattern for the front and back. I cut the V neck out of the front later.


The sleeves were the most time-consuming part of making this dress. The pattern for the sleeves was a little tricky, but here's a little explanation of how I made it. 

It took three layers of sleeve to make all of the arched pieces.

I started with a lining made out of a breathable stretchy gauze in the shape of a normal sleeve or mutton sleeve. Then I cut 6 copies of a "top" sleeve out of the vinyl (3 layers per sleeve) and split each of these into the arched shapes (which I numbered so I would know which order to put them in).

This is what the sleeve looked like before cutting the triangles.


The finished sleeve.

The real trick to sewing this vinyl was LOTS and LOTS of baby powder!


A zipper in the back makes it much easier to put this dress on a 2-year-old.


Harley Quinn Mismatching Leggings

$
0
0
Quick trick to making Harley leggings.

Aquire two leggings or pantyhose of separate colours.  Snip down the center seam between the right and left legs and resew the opposite colour piece using a zig zag stitch.  The zig zag stitch will help keep the stretch.  Then you are ready to wear.  You can make two pairs with this method, which is great for when you get a run in your stockings


E3 Year of VR

$
0
0

VR
I’ll give a star rating for each, with the top rating of 10 the best experience of all the devices to use as a comparison.  These demos were hard to get into, either you had to book a demo right at 10am which filled up in 5 seconds, for line up for up to 6 hours for Doom.  Some demos you couldn’t even get into unless you were Media, but Ubisoft did provide peep windows so we could watch them play Star Trek Command Center

Playstation VR Farpoint with Aim Controller.

Unfortunately, I didn’t get into one of these demos, but people walking off seemed to really enjoy the experience.  They said that holding the riffle made a big difference, and the objects being in your face was causing people to dodge on instinct.


Oculus Gear VR (Samsung Phone attachment)

8
This has changed since I’ve has last tried it at PAX last year.  The viewpoint for the eyes are no longer a rectangular square with a separation barrier between the two.  Instead it is two circular lens for each eye to look past. 
I tried three games with this device.  Each game gave me a very different experience
Pin Ball, just like a real PinBall machine you are standing over it, well actually you are standing way over it and your chin had to be against your neck to look at the bumpers (some good feedback for the developers).  Trigger buttons on the PS4 controller worked as the bumpers.  Ok decent game.
Shooting Zombies, you aim with your head tracking, and shot by tapping the trackpad on the side of the Oculus device.  Wow I’m actually pretty decent at shoot games now.  Though I wonder if holding my hand up against my head for long period of time will be tiring or not.
Space Ship, my viewpoint is of a person flying the spaceship from inside.  So if I looked left and right I was only looking left and right inside my ship to look at the controls.  To move the ship I still had to use the controller to move the ship.  Having two motions of moving left and right was confusing and frustrating, you can look left, but your ship turns really slowly to head left.  I thought the controller took away the illusion from the experience. 
In general, graphics were a little pixelated.  I could never get full focus, 80% of the screen would be clear with pockets of fuzzy (I wonder if it’s because I have astigmatism).  Reading text on the screen wasn’t that great.  I had a major problem that every time I started up a new game, my center had moved.  At one point I had to play the game slanted because my center had rotated.


Oculus Touch

9
The Touch are the duo controllers for the Oculus.  Very Comfortable, pretty easy to use.  I played PvP game where the human stands on a hoverboard in front of a goal line and we throw the disc across the field to get/save the goal.  The rules were a mixture of ultimate Frisbee and Pong, with a theme similar to Tron.
To move was to lean left and right like on a snowboard.  Because of how much I moved in game, it felt like my play space was much larger than it really was as I never actually moved my feet from their placement.  In game, the controllers were displayed as your hands, you moved your arms and wrist in the same motion you would as throwing a Frisbee.  The buttons were used to grasp and let go of the disc.  Playing and watching others play the game, some people were very comfortable playing the game immediately, while others had difficult time with the throwing and catching. 


Playstation VR - Harmonix Music VR

9
I used a drawing demo which you were given a paintbrush with different textures to draw lines that  changed colours and pulsed to the music.  You can also move and rotate the entire drawing around as you drew.  As I drew lines around myself I got myself tangled in the cords.  And I hit the playstation employee as I was drawing.  The graphics were decent, the motion was tracked smoothly and never lost me 👍

Playstation VR - Psychonauts in the Rhombus of Ruin

4
I was excited for this game, but this ended up as a disappointment.  They gave me a Dualshock 4 Controller.  When you have to move your head AND use the analog stick for moving, that confused the crap out of me.  In the game, Raz can put his mind into other people’s brains and control them.  And that’s what it felt like, I felt like I was inside someone else’s head and I could see through their eyes, but I couldn’t control them naturally.  The controller completely broke the immersive experience. 


Playstation VR – Resident Evil biohazard

Lots of people hung around the Resident Evil watching others play.  Over and over I heard the question, “Would you play this game in VR”, and everyone said NO!  And watching one of the players scream randomly I’m so glad I’m not trying either.

Playstation VR - Statik

10
Just when I lost faith in VR with controller experiences, Statik impressed me.  Similar to my thoughts on why I like the Vive controllers (I guess you’ll have to read farther down), the developers of this game made the placement of your hands on the controller positioned in the game as part of the experience.  Within the game your hands are locked inside a box bounded by the controller’s physical size, the PlayStation Move camera tracks the controller so even if you move your hands with the controller, it follows in the game appropriately.  The graphics were cartoony, so the graphics didn’t seem lacking.  Only 20% of the people who played the game figured out all the 5 puzzles in the 10-minute time frame, YAY for me I got it in 7 ½ minutes.  When I was finished my demo, folks came up to put up a place card that this game won an award for “Immersion”, I agree it was well deserved.


Playstation VR Hardware

Look at that brick attacked to the VR headset!


360 Dome

Ok this isn’t quite VR, but it’s rather immersive.  Your whole screen is a dome around you.  The small one here hopefully gives you a good sense of how it looks.  But when you are inside a dome that fits 10-40 other people with things projecting all around you, you get very lost into the scenery it provides.  It’s basically like a planetarium, but more personal.  They weren’t advertising this to be a home product, but more for corporate events or learning environments.  I watched a film of a skydiver jumping off a plane, and what it looked like to be spinning free fall, then moved to a flight video from a bird’s view.  HD quality was amazing, and just relaxing to enjoy like an Imax experience.


PicoNeo

Ok this product personally annoyed me.  It was a complete rip off the Oculus line.  The way that it was wore and adjusted on your head, the way that you changed the focus, the quality of the graphics, the visual look of the device except that it’s orange, game play style, even the bugs I encountered were the exact same as my Oculus Gear VR experience! 0 for you for not have a single piece of innovation from your own work!


HTC Vive with Steam VR

10
Painting program, the lines were very smooth tracking with no issues, but visually cleaner that the Playstation VR Harmonix game.  The controllers also looked like controllers in the game, very intuitive to use, a square of metro buttons displayed above the right controller, and you would rotate your hand to rotate the square for more button options.  The left controller was used to aim and select the button options, and then for painting.  Odd that they made everyone paint with their left hand, the guy before me switched his “left” and “right” hand to paint with his physical right hand.
Space Shooter.  I am standing on a planet, and space ships are flying around in space shooting at me.  My controllers turned into guns (looked similar to the Halo guns) that were slightly larger than the physical controllers, but my hand was placed correctly for the triggers, and I could see my reload on my digital counters like a laser tag gun.  I was bombarded with spaceships by level 4 that I was shooting arms open left and right, Matrix style.  I could move around a lot to avoid the firing. 
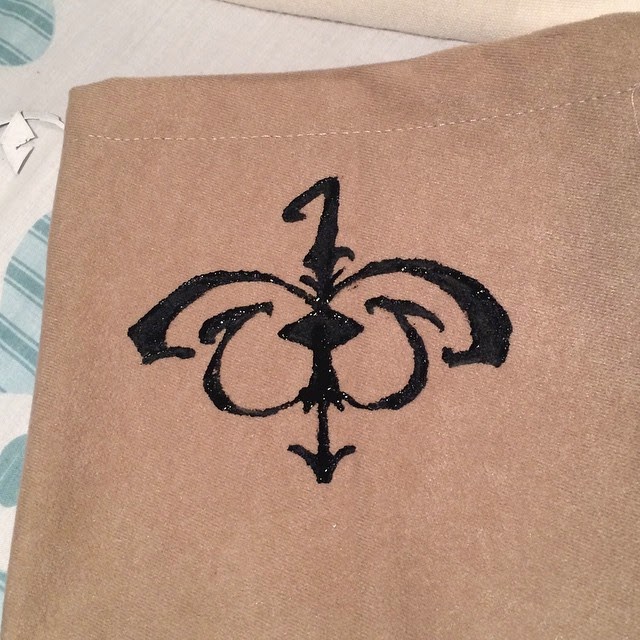

HTC Vive PugsVR

6
This is some Kickstarter game for a multiplayer puzzle game.  The logo confused so many people, “is this a dog game? Is this for dogs?  Are you pretending to be a dog”, none of the above.  In the game you move around different rooms to find puzzle pieces.  You face the direction you want to go and push up on the trackpack of the Vive.  It was easy to use, but the motions made me so motion sick I had a lay down after the demo.  The graphics were still in the skeleton stages.  The physical setup was interesting.  You can see to avoid the cord problem they have the device cords above your head.  But because were were actually turning in 360 directions to face which way to move on the map, I ended up moving around so much that the helpers had to stop me and move me back to center before I knocked over the whole physical setup. 


Naughty America VR

I was so excited to try this, but they had over 60 people in line and one demo station.  Sorry too impatient to wait.  When I walked up, one of the sales folks made sure to mention to me that “we have it from a Women’s perspective as well”.


3D Rudder

3★
One of those small companies off to the side.  They make a balance board for the VR systems.  So if you don’t want to walk or don’t have the space for it.  You can use this board to simulate moving directions including up and down.  To move up you have to lean your left foot forward and right foot backwards.  It was kind akward. 


Vuzix

4★
This was a major disappointment.  I got two experiences here
3D content, plugged into a PS4 and playing a 3D video game that was made for those oh so popular 3D TVs.  It looked like I was looking at a 3DS super close to my face, yet I could still see the screen’s edges very clearly. 
VR Experience, it plays OSVR (universal open source VR ecosystem) content.  The head tracking was good, the graphics quality was actually better than PlaystationVR, but the fact I could see the bounding box of the screen just made me feel I was watching a movie theatre screen. 


Immerex Cinema

Unfortunately, I was too busy running to a demo appointment I wasn’t able to try this out.  From what I quickly gather, it looks like they are focusing on video, not gaming.


That's the end of VR.  There was of course lots of other things that happened outside VR.  If you want to check out my other pictures of the other things to see at E3, check them out on my facebook 


Cosplay - Colouring your Wig with iDyePoly

$
0
0

So for my Charizard cosplay I was worried about ordering another wig that it would arrive in time for the convention I was attending.  So I decided to experiment with one of my old wigs and try to make my own.  


A few years ago I wrote about how to use Sharpies to color your wig Cosplay - Colouring your Wig
I"m reusing this very same wig to give it a new transformation.


Dyeing fabrics has been very common on use of natural fibers.  I found iDyePoly which claims it can dye synthetic fibers.  


The instructions call for you to boil your fibers in the dye bath for a half hour, it require good ventilation and suggest you do not reuse the heating vessel for cooking food.  I however didn't follow the instructions exactly.  

I boiled water to activate the iDye then mixed it within a ziplog bag and shoved in my wig.  I wanted a seal container since ventilation suggested fumes.  I left it in a tub and let it marinate in my garage overnight.  Hopefully the more time in a hot solution will equal better saturation since I wasn't keeping it at a constant boil for a half hour.  


Nice coloUr results in the morning.  Now to the rinsing ... ~cough~ in the driveway.  FYI rinse many times, to get the excess dye out (if you're bleeding, it just means you need to rinse more).  And then rinse some more, to help get the smell out.


~brush brush brush~


TaDa!  beautifully colored wig, reusing something i never use anymore, and only spent a fraction of the cost instead of buying a new wig.  

Grab You Craft Foam, it's Craft/Play Time!

$
0
0
Let's make a quick THOR helmet!


Hey everyone, Avalyn here! Let's have some fun with craft foam!

I've made a couple of new videos for you. The first is how to make a simple helm out of craft foam. You can do your own design, or be Thor, Wonder Woman, or even She-Ra, Princess of Power! It's super simple so kids could do it (with parental supervision!).

Are your kids into watching toy vidoes? My girls just discovered them on YouTube and my oldest is obsessed. Now she wants to make her own. It's actually pretty fun and simple to shoot a video with even just a smart phone. Make a scene with some dolls or action figures! Here's another little video to give you an idea of how to make a backdrop for your scene with just a couple of sheets of colorful craft foam.


If you like my videos, make sure to subscribe to my YouTube channel! Don't miss out on future fun! I'm already working on more craft and toy videos and unboxings!

Speaking of unboxings, you won't want to miss this one.


DIY Custom Worbla LOL Surprise Doll Dress

$
0
0
Let's make new clothes for the LOL Surprise dolls out of Worbla scraps!


This is a craft for grown-ups; it requires the use of a heat gun, plus painting with nail polish.

Materials:

Worbla scraps
Nail polish

Supplies/Tools needed:

Heat gun
Scissors for Worbla
Paper
Permanent Marker

This craft took about 30 minutes to make, plus paint & drying time.
Viewing all 121 articles
Browse latest View live